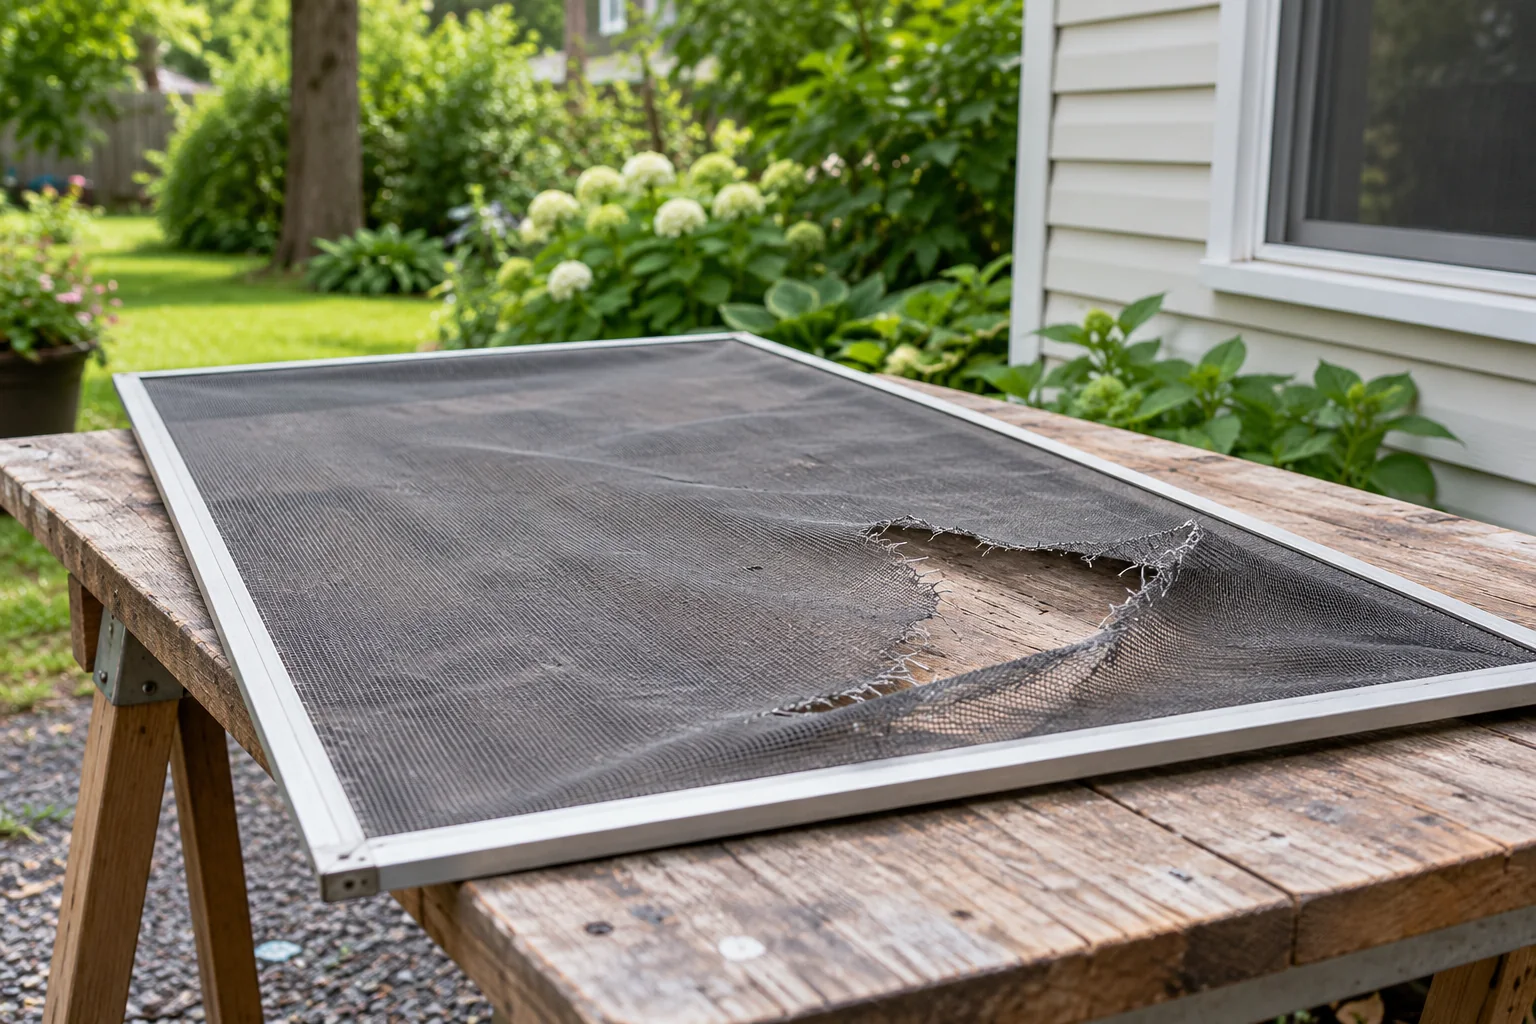
For a removable screen with a sound frame and a tear too large for a small patch, replace the mesh and spline on a flat work surface. Match the frame groove and material, keep the mesh square and moderately taut, then reinstall the screen using the window maker's instructions.
A torn screen can let insects in, but an over-tight replacement can bow the frame or pull a corner apart. The repair begins with deciding whether the frame is sound and whether the screen can be removed safely. Work on the screen panel, not from an open upper-story window.
Make the first move safely
Never lean out of an open window or rely on a screen to prevent a fall. Remove only a panel you can reach safely from inside, or arrange professional service.
Step 1: Decide whether to patch, rescreen, or replace
A tiny hole in otherwise sound mesh may suit a matching patch. A long tear, several damaged areas, or brittle material is usually a better candidate for complete rescreening. A bent frame or broken corner may need a replacement screen instead.
Confirm the screen is removable without reaching outside a hazardous opening. A screen is not a fall barrier; keep children and pets away from an open window.
Inspect the panel before buying anything
Close the window and study the screen from inside. A small puncture in a strong, evenly tensioned panel may be patched with a material-specific kit. If the surrounding mesh crumbles when touched, several tears have appeared, or a rip runs toward the edge, a fresh sheet will usually look cleaner and hold longer. Check the aluminum or vinyl frame separately. A new sheet of mesh cannot straighten a bowed rail, repair a cracked corner, or replace a missing retention clip.
Find out how this particular screen comes out. Some lift into a top channel and release at the bottom; others have spring pins, pull tabs, or manufacturer-specific hardware. Photograph the installed orientation and the location of each tab. Do not remove the panel if doing so means leaning outside, reaching over a railing, or leaving an upper-story opening unattended. Keep children and pets away from an open window throughout the job. A screen keeps insects out; it does not serve as a fall barrier.
Step 2: Measure the frame and choose materials
Photograph the screen in place, label its orientation, and measure the frame and spline groove according to the product instructions. Keep a short piece of old spline as a reference, but replace brittle or stretched spline.
Choose mesh for the window and household needs, then check the maker's compatibility guidance. Lay the frame on a flat protected table and have a spline roller, scissors, and the specified spline ready.
Match mesh to the job
Standard insect screen, finer mesh, heavier pet-resistant screen, and specialty sun-control materials solve different problems. Their thickness and stiffness may differ, so the same spline may not fit every combination. Read the screen maker's guidance for the mesh and frame rather than choosing solely by price or package color. For a historic or unusual window, confirm that a generic replacement will not change the appearance or interfere with its tracks.
The spline is the flexible cord that presses the mesh into a channel around the frame. Save a short piece of the old cord and compare its profile with the frame groove, but expect old cord to have flattened, stretched, or become brittle. A cord that is too narrow may pop out; one that is too thick can be difficult to seat and can stress the frame. If several sizes seem close, test a short run with the actual mesh in an inconspicuous section before cutting every strip.
Set up the tools in the order used
Place the panel flat, then gather a spline roller, new spline, the selected mesh, scissors, a soft brush, and a sharp trimming blade. Check whether the roller has different wheel profiles and use the one recommended for the screen system. A wide straightedge can help keep the mesh square during setup. You may need a small blunt pick to lift the old spline end, but do not dig a metal point into a soft frame groove.
Remove the screen according to the window manufacturer's method. Label the top edge with removable tape if the panel can be flipped accidentally. Then measure the opening and compare it with your purchased material before pulling the old mesh away. If the frame is not square, measure both diagonals and inspect the corner joints. Replacing mesh while the frame sits twisted may lock the distortion in place or leave a gap when the panel returns to the window.
Remove the old mesh with patience
Find a spline end at a corner and ease it up. Pull steadily around the perimeter rather than yanking across a corner. If it breaks, lift the next section without gouging the channel. Set aside the old mesh and clean dust from the groove with a brush or cloth. A packed groove can make a correctly sized spline seem too large. Avoid soaking wooden or vulnerable frames; use the cleaning method appropriate to their finish and let the groove dry.
Lay the new mesh over the frame with consistent overhang on all sides. If it has a visible horizontal or vertical pattern, align that pattern with a straight frame edge. Let it rest naturally. Do not stretch a diagonal corner to make the sheet look taut before any spline is installed. The rolling operation will tension it. Check once more that the frame lies fully supported and that the screen's intended exterior face, if specified, is oriented correctly.
Step 3: Install the mesh without distorting the frame
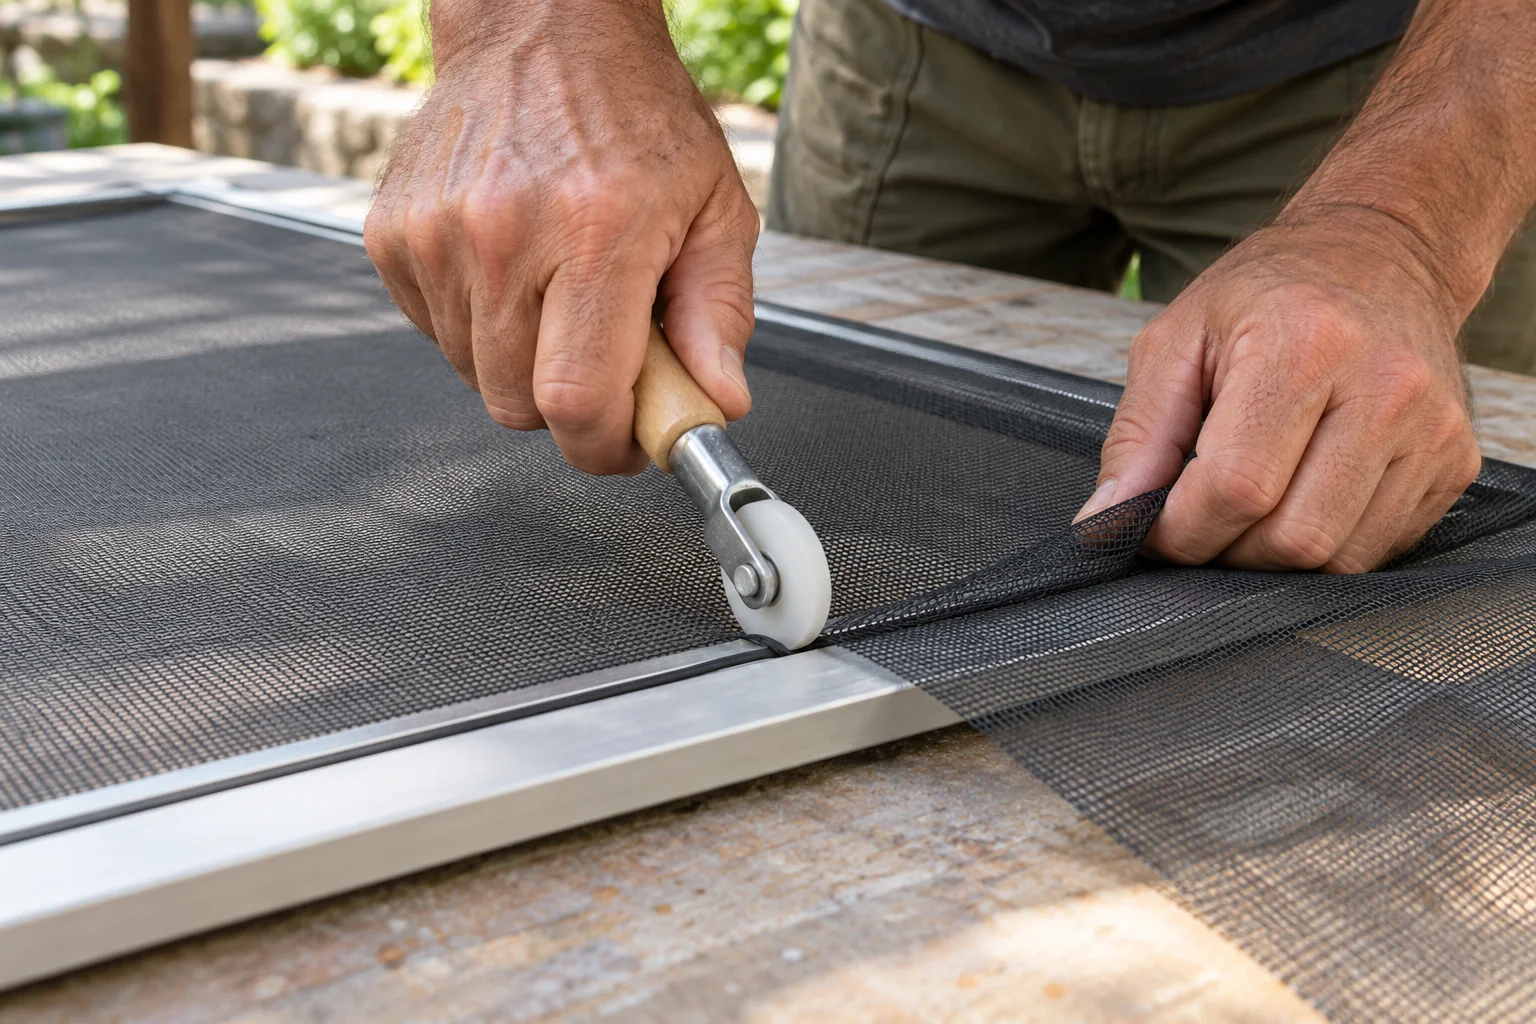
Remove the old spline gently, clear the groove, and lay new mesh over the frame with an even overhang. Secure one side with the roller and spline, then work around the frame while keeping the pattern straight.
Use moderate tension. Pulling hard may bow a light frame; leaving the mesh loose may create ripples. Rework a short section if needed rather than forcing the roller through a damaged corner.
Roll the first side in a straight line
Start where the product instructions recommend, often at a straight side rather than a damaged corner. Hold the mesh in place and roll the spline into the groove with steady, modest pressure. Advance a few inches, then look back at the weave. It should remain square to the frame. If it drifts, lift that short section of spline and reset it now; a skew at the first side becomes more visible after the opposite side is fixed.
Continue around the corners without forcing the roller through them. A roller can crush or nick a weak corner joint if pressed sideways. Seat the spline fully but avoid stretching it as you feed it into the channel. Stretching may make it shrink back later and expose a gap. Follow the material maker's instructions for joining the spline ends. Keep your free hand on the frame, not beneath the roller path.
Keep the opposite side moderately taut
On the second and later sides, smooth the mesh flat with your palm. Draw it just tight enough to remove large folds while the spline goes in. Do not pull against the rail until it bows inward. If the screen has a visible grid, use that grid as a reference. A slight wrinkle can often be corrected by lifting and reseating a short run; a bowed frame requires easing the tension over a longer run. Work deliberately around the perimeter rather than racing to the trim step.
After all sides are seated, sight along each rail. Look for new curvature, unequal corners, or spline that sits above the groove. Press down a lifted segment using the roller if the size is appropriate. If the spline repeatedly lifts, stop to recheck material compatibility; applying more force may damage the channel. A sound result has a flat frame and a mesh surface that is evenly tensioned without a drum-tight pull.
Trim only after the perimeter passes inspection
Use the frame's outer edge as a guide where the maker recommends it, and cut excess mesh on the waste side of the spline. Work with short, controlled strokes. Angle the blade so a slip does not cut the finished mesh or your hand. Keep the blade away from painted trim and protected table surfaces. If you are uncertain about the cutting path, practice on a scrap piece and leave a little extra material until the final pass.
Inspect all four corners after trimming. A tiny unseated corner is easier to correct while the panel is still flat than after it is in the window. Brush away loose strands and check that no trimming fragments remain in the track. If the mesh has a protective coating or specified face, verify the orientation before lifting the screen off the table.
Step 4: Trim, reinstall, and check the fit
After the spline is fully seated, trim excess mesh carefully on the outside of the groove, keeping the cutting tool away from the finished panel. Check corners for gaps and look across the surface for distortion.
Reinstall the screen using the window maker's clips or tabs. Confirm it sits securely without blocking window operation or drainage, and store the product details for a future repair.
Reinstall without forcing the frame
Carry the panel by its frame, supporting the long side. Use the same clips or tabs and orientation recorded earlier. The screen should sit in its track and retainers without being pushed into a bend. If it suddenly seems too wide, check for a reversed top and bottom or a caught spring pin. Never leave a screen partially attached where wind could dislodge it. Close and reopen the window to confirm the hardware clears the screen.
Inspect the entire perimeter from inside for daylight gaps. Pay special attention to the lower corners and any weatherstripping that was disturbed during removal. A flat, neatly rescreened panel can still admit insects if it is not seated in the correct channel. Confirm that the window closes and locks normally and that its weep or drainage openings remain unobstructed. Do not improvise adhesive over drainage paths.
Troubleshoot the result by symptom
If the mesh ripples, look for insufficient tension or a section of spline that has not reached the bottom of the groove. If a rail bows, the mesh is probably too tight or the material combination is stressing a light frame. If spline pops out, check diameter, groove debris, and mesh thickness. If a corner gap appears only after installation, confirm the panel itself is square and all clips engage. Make one correction at a time so you can see which change fixed the problem.
A screen that cannot be seated securely after rescreening may have had a weak frame before you started. Do not use the mesh as a way to pull damaged rails together. Replacement frames and corner keys vary by manufacturer, and the right part may be more economical than repeated mesh changes. Keep the measurements and photos you took; they make ordering a matching replacement easier.
Check the work as a complete sequence
A step-by-step repair is only complete when the surrounding area works normally again. Return to the reason you started: does the part move, seal, drain, or fasten as intended? Test gently first, then under ordinary use if the product instructions allow it. Look for changes in alignment, fresh moisture, loose material, or a finish that has not cured. If the result is only partly better, identify which step failed rather than adding more product or force everywhere.
Set aside the packaging and instructions until the test is complete. They may contain a cure time, a recheck interval, or a warning about compatible materials. Photograph the finished area and record the product name and date. If someone else in the home will use the repaired item, tell them about any temporary restriction, such as avoiding water or load while a material cures. A good-looking repair can still fail if it is used too early.
Prevent the same failure
Ask what caused the original damage. A recurring leak, movement, impact, or moisture problem will undo a cosmetic fix. Deal with that cause if it is within safe homeowner scope; otherwise arrange diagnosis. Avoid making the next repair harder by hiding screws under permanent adhesive, painting over a required access point, or discarding the part number. Small notes now can save a much larger investigation later.
If the repair required more force or disassembly than expected, or if a safety feature no longer works, stop and seek help. Do not call a repair finished because the immediate symptom disappeared while the assembly is less secure. The useful endpoint is a stable, tested result that follows the relevant product instructions and can be maintained later.
Quick recap
- Decide whether to patch, rescreen, or replace.
- Measure the frame and choose materials.
- Install the mesh without distorting the frame.
- Trim, reinstall, and check the fit.
Frequently asked questions
Can I use the old spline again?
Only if it is flexible, undamaged, and compatible with the new mesh and groove; follow the material maker's guidance.
Why does the frame bow after rescreening?
The mesh may have been pulled too tightly or the spline may be an unsuitable size. Stop and correct it before reinstalling.
Should I patch a long tear?
A complete rescreen is usually neater and more durable when the tear is large or the surrounding mesh is brittle.
Sources & further reading
Manufacturer instructions for your exact model take priority.