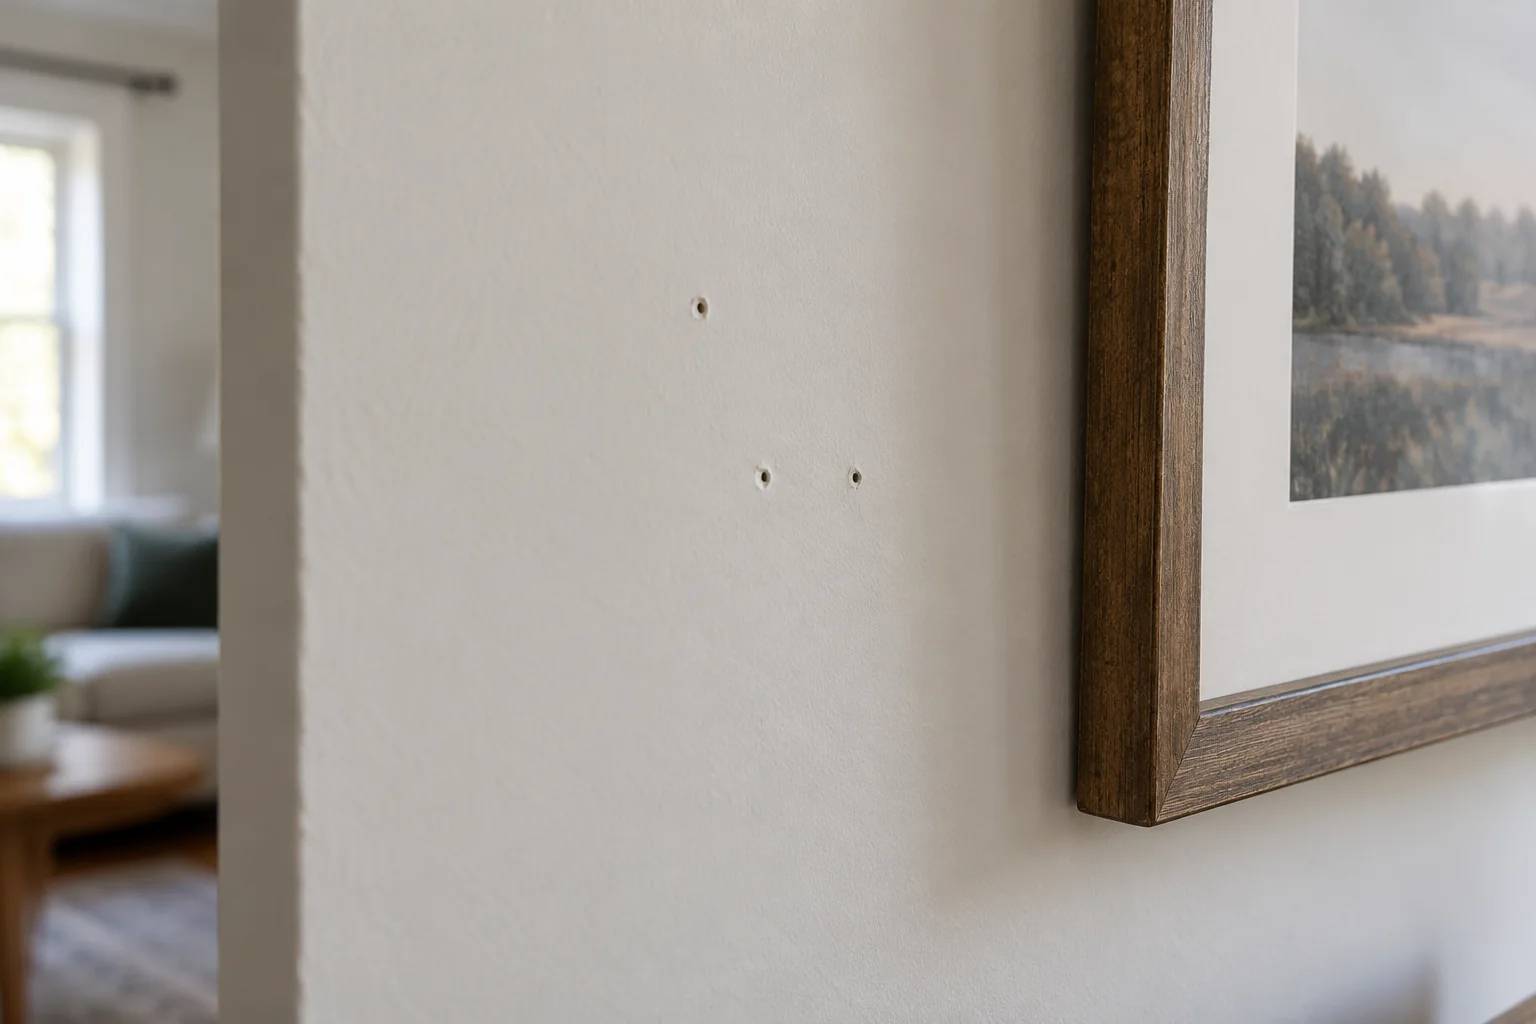
For small holes in sound drywall, remove loose edges, apply suitable lightweight filler, let it dry fully, smooth it, and prime before painting.
This method is for small cosmetic holes, not soft walls, damp damage, or large openings. A patch looks best when it is flatter than you think it needs to be. Thick filler and rushed painting are common reasons the repair remains visible.
Make the first move safely
In U.S. homes built before 1978, painted surfaces may contain lead. Arrange appropriate assessment before disturbing old coatings; other countries have different histories and rules.
Step 1: Check the wall before starting
Look for staining, softness, or a recurring crack. Resolve moisture or movement first. In older properties, assess paint and wall materials before scraping or sanding; do not create dust from unknown finishes.
For a simple nail hole in a known safe surface, gather a small filling knife, compatible filler, a damp cloth, primer, and matching paint. Protect the floor and follow the product's ventilation and dust precautions.
Confirm the hole is suitable for a small patch
A shallow nail hole, a dent, and a hole that goes all the way through drywall do not call for exactly the same treatment. Shine a light across the wall and gently inspect the edges. If the paper face is torn, trim only loose material with an appropriate tool rather than covering a flap that will later lift. If the wall feels soft, damp, stained, or crumbly, investigate the cause before cosmetic work. A patch over ongoing moisture will fail and may hide damage that needs a different repair.
Check what is behind the work area before driving a tool into the wall. Electrical wiring, plumbing, and other services can run near outlets, switches, fixtures, and cabinets. For a tiny surface repair, avoid unnecessary drilling. If you do not know what lies behind a larger hole, stop and seek guidance. In older properties, painted surfaces may contain hazardous coatings. The exact age thresholds and rules depend on location; the article's lead-paint warning is a reason to assess before scraping or sanding old paint.
Select the right repair material
Spackling compound may suit small dents and fastener holes, while a larger opening often needs a patch or backing designed for the size and wall construction. Read the product label for maximum depth, whether multiple coats are required, drying conditions, and primer compatibility. A tub that has dried out or separated may not spread or cure as intended. Do not use an adhesive, caulk, or thick paint to fill a hole simply because it is on hand. Those materials can shrink, stay flexible, or leave a visible outline.
Match the tools to the scale: a clean putty knife wider than the damage, a drop cloth, a damp cloth for dust, and appropriate personal protection. Good lighting matters. Side light reveals ridges that look invisible under flat overhead light. Move pictures and furniture far enough away that dust and splatter will not land on them. If the damage is near a corner bead, trim, or tile, protect the adjacent finish before spreading compound.
Step 2: Fill in light passes
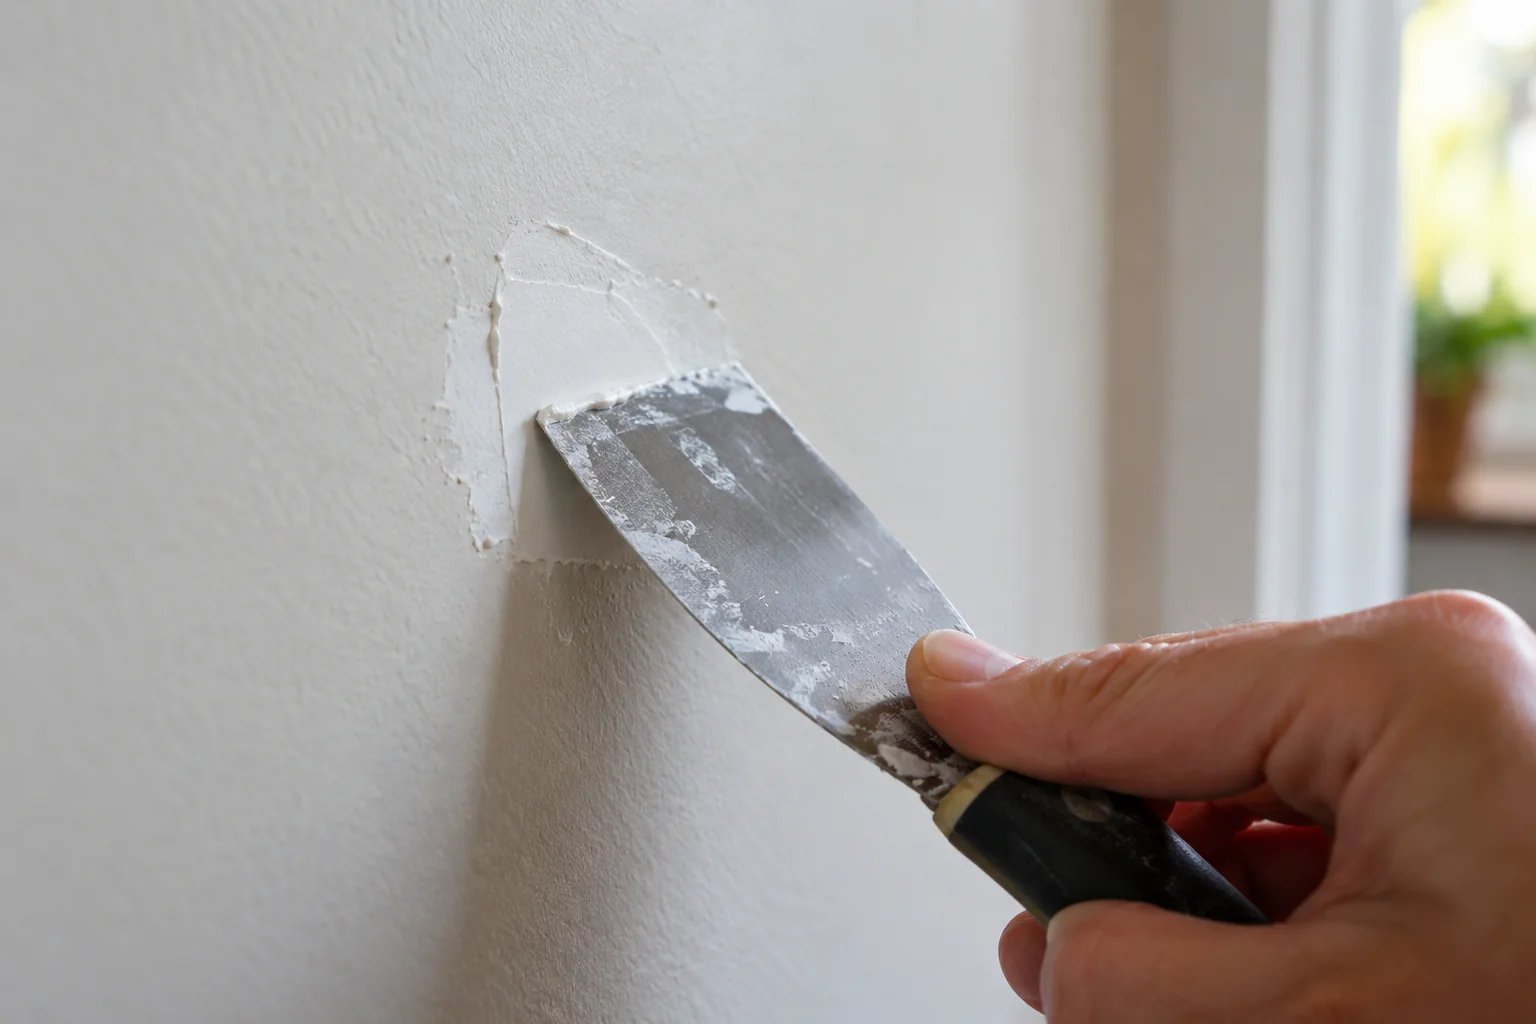
Remove only loose material without enlarging the hole unnecessarily. Spread a small amount of filler across the opening, then draw the knife flat to remove excess.
Allow the stated drying time, which changes with thickness and conditions. If the filler shrinks, add another thin pass. Do not bury a large void in a thick layer of lightweight filler.
Build a flat repair with thin passes
Remove loose debris and dust, then press the specified filler into the opening. Draw the knife across the surface with steady pressure, leaving a thin layer rather than a mound. Product instructions vary, but several light coats are usually easier to control than one thick coat. Allow each pass to dry as directed before adding another. Rushing the next coat can trap moisture, crack the surface, or pull the first layer away. A deep cavity may need a backing or different patch method instead of extra compound.
Feather the edge beyond the hole so the transition gradually meets the original wall. A narrow ridge directly around the damage will show when painted. Rotate the knife or work from a second direction if the surface catches. If the paper face is torn, follow the appropriate sealing or priming guidance before wet compound makes it bubble. Do not sand aggressively into intact paper; the goal is to blend the filler, not enlarge the damaged area.
Know when a mesh patch helps
A self-adhesive mesh patch can bridge a modest opening when the product is rated for that size and the surrounding wall is sound. It still needs compound feathered wide enough that its edges disappear. A patch placed over flaking paint or dust will not bond well. If the hole is large, the edges are unsupported, or the damage reaches a stud or service opening, a piece of drywall with proper backing may be needed. The label's size limit is a starting point, not a guarantee that every shape will hold.
Keep the repair flat rather than pushing the mesh into the cavity. If the first coat exposes the mesh pattern, let it dry and add a thin second pass. Trying to bury it in one thick application can create a noticeable bump. Do not hide a loose outlet box or damaged corner behind a cosmetic patch.
Step 3: Smooth and prime
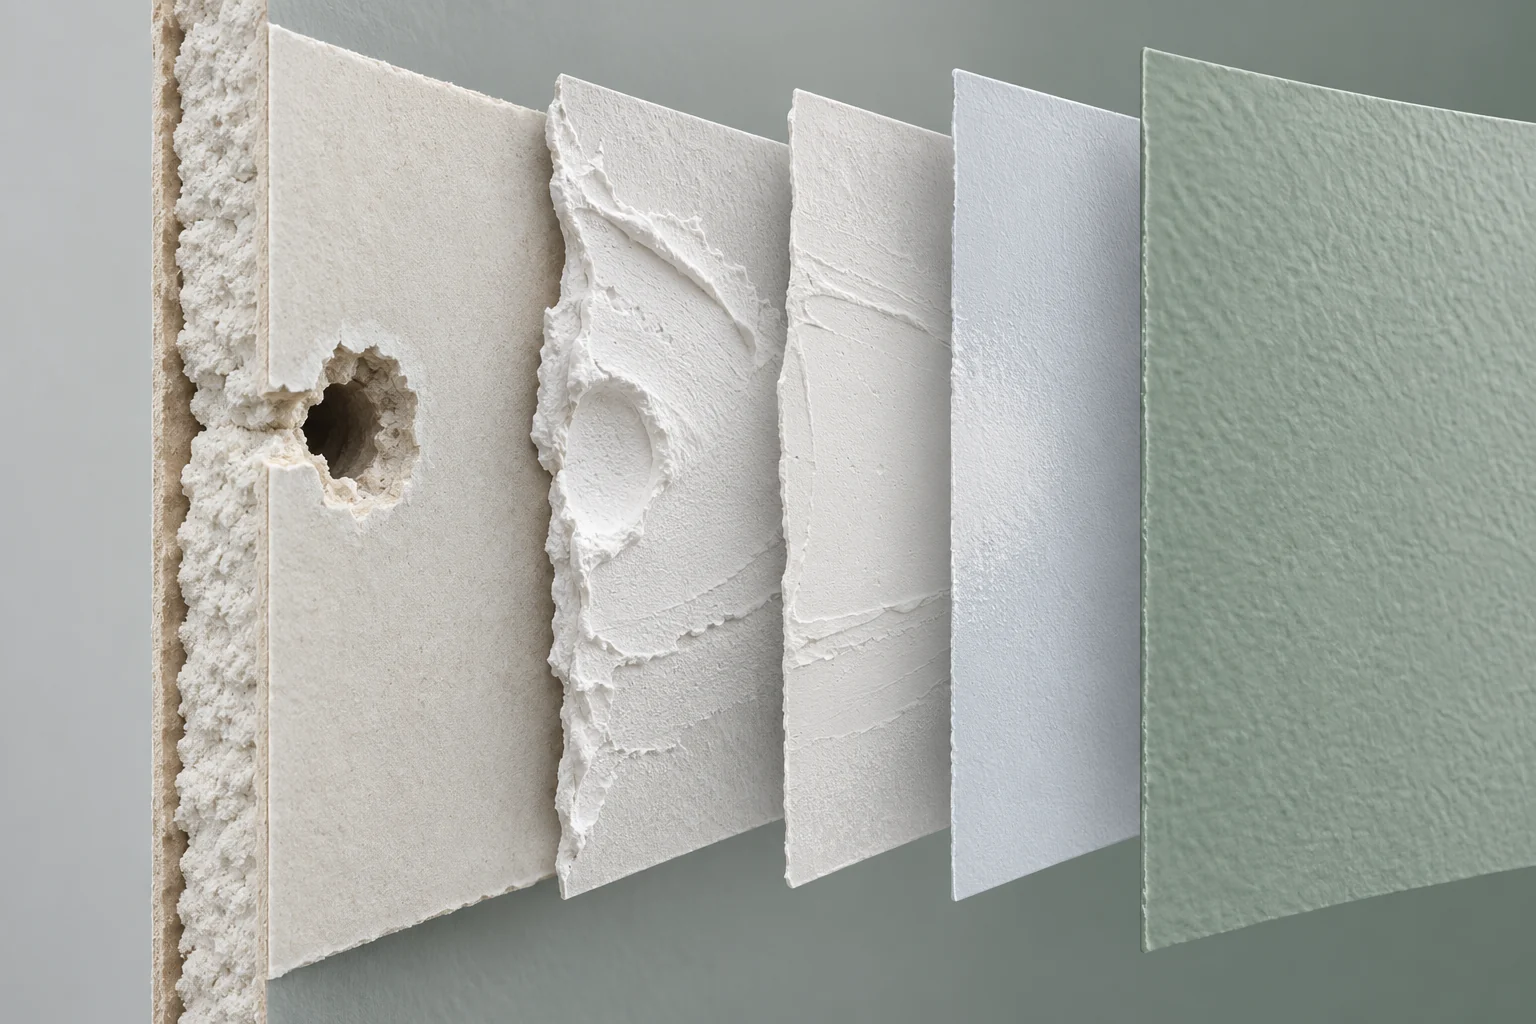
Once dry, smooth carefully using the product's recommended method. Contain dust and clean the surface before applying primer. Primer helps keep the repaired spot from absorbing paint differently.
Apply matching paint after the primer has dried. Even an identical paint color may show against an aged wall; painting to a natural break or the whole wall can give a more even result.
Sand only after the material is ready
Once the compound is fully dry, use a fine abrasive appropriate to the product and work lightly. Hold a bright lamp at an angle so shadows reveal highs and lows. Stop when the repair blends into the wall. Over-sanding exposes the patch or tears the surrounding paper, sending you back to filling. Keep dust controlled and use the protective measures stated on the product label. If old paint may contain lead or another hazardous coating, do not use ordinary sanding as a shortcut.
Wipe or vacuum dust with a method suited to the material before priming. Primer helps the patched area absorb finish paint more evenly; without it, the spot may remain dull or glossy despite a good color match. Use a primer compatible with the patch and wall paint. Let it dry as directed. Paint a test area under the room's usual light. A repair can be perfectly flat but still visible because the existing wall color has aged or the sheen differs.
Blend color, texture, and sheen
Keep a record of the original paint brand, color, and sheen if available, but remember that an old can may not match a wall exposed to years of light and cleaning. Touch up with a small roller or brush that approximates the existing texture. For a prominently lit wall, repainting from corner to corner may give a better visual result than a small spot touch-up. Textured walls need a texture method that matches the existing pattern; a smooth patch on a stippled surface will catch the eye.
Before storing leftover paint, label it with the room and date. Follow local disposal and storage instructions. Do not pour paint or washout into a storm drain. The aim is a repair that is sound and visually integrated, not just a hole that has been filled.
Step 4: Check under side light
Look along the wall rather than straight at it. Raised edges become obvious in light from a window or lamp. Correct the shape before adding more paint, because paint will not flatten a ridge.
Inspect the patch in the light that matters
Look at the wall by daylight and at night with the room's usual lamps. Side light is particularly revealing along hallways and near windows. If you see a ridge, pinhole, or flashing after priming, correct that specific issue rather than applying more finish paint repeatedly. A shallow low spot may need another thin compound pass, followed by drying, sanding, and primer. A color mismatch may need a broader repaint. Distinguish the surface shape from the finish before choosing the next step.
Touch the area gently only after the product's stated cure time. It should feel firm and should not crumble or flex under normal contact. If the same location cracks again, look for movement, moisture, or an unsupported edge. Repeatedly filling a moving joint is not a lasting repair. A professional can advise whether a larger section or joint treatment is needed.
Avoid preventable repeat damage
If a doorknob caused the hole, fit a suitable stop or bumper after repair. If furniture repeatedly strikes the wall, adjust its position or protect the contact area. Do not hang heavy items from the patched material alone; use a fastening method appropriate to the wall, load, and hidden services. A filled hole does not restore the original strength of an anchor point. Keep the patch product and paint details in your home notes for small future repairs.
Know the boundary of this guide. Large holes, water damage, mold, damaged insulation, loose electrical boxes, and cracks that continue to widen need more than spackle. A small cosmetic repair is satisfying because its sequence is clear: assess, prepare, fill lightly, dry, feather, prime, and inspect. Keeping those steps separate produces a better result than trying to complete everything in a single pass.
Check the work as a complete sequence
A step-by-step repair is only complete when the surrounding area works normally again. Return to the reason you started: does the part move, seal, drain, or fasten as intended? Test gently first, then under ordinary use if the product instructions allow it. Look for changes in alignment, fresh moisture, loose material, or a finish that has not cured. If the result is only partly better, identify which step failed rather than adding more product or force everywhere.
Set aside the packaging and instructions until the test is complete. They may contain a cure time, a recheck interval, or a warning about compatible materials. Photograph the finished area and record the product name and date. If someone else in the home will use the repaired item, tell them about any temporary restriction, such as avoiding water or load while a material cures. A good-looking repair can still fail if it is used too early.
Prevent the same failure
Ask what caused the original damage. A recurring leak, movement, impact, or moisture problem will undo a cosmetic fix. Deal with that cause if it is within safe homeowner scope; otherwise arrange diagnosis. Avoid making the next repair harder by hiding screws under permanent adhesive, painting over a required access point, or discarding the part number. Small notes now can save a much larger investigation later.
If the repair required more force or disassembly than expected, or if a safety feature no longer works, stop and seek help. Do not call a repair finished because the immediate symptom disappeared while the assembly is less secure. The useful endpoint is a stable, tested result that follows the relevant product instructions and can be maintained later.
Quick recap
- Check the wall before starting.
- Fill in light passes.
- Smooth and prime.
- Check under side light.
Frequently asked questions
Can I paint straight over filler?
Use the filler and paint manufacturers' instructions. Priming is generally helpful for a consistent finish.
What if the hole is larger than a nail hole?
Use a repair method rated for that opening, often involving a patch or backing. Do not keep adding unsupported filler.
Sources & further reading
Manufacturer instructions for your exact model take priority.